 -or-
-or- 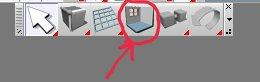
Promised these a few weeks back so figured I'd better just sit down
and get them done.
I'll keep it to steps that should work in older versions even though
the images will be from 7.1.
Image Plane setup tutorial:
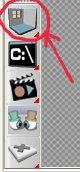
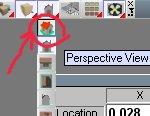
Click here to set up a new scene:
-or-
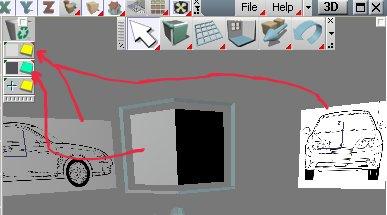
Create a plane by clicking here:
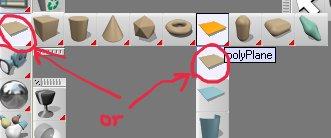
Then left click once in the modeling window. Right click once or press
space bar to deselect.
Right click on the Plane icon to see if the plane was created as a single
or double sided plane:
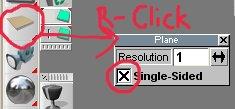
If "single-sided" wasn't checked, you'll need to check it, delete the plane, and create a new one.
Right click here: 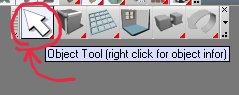 to open up the object information panel:
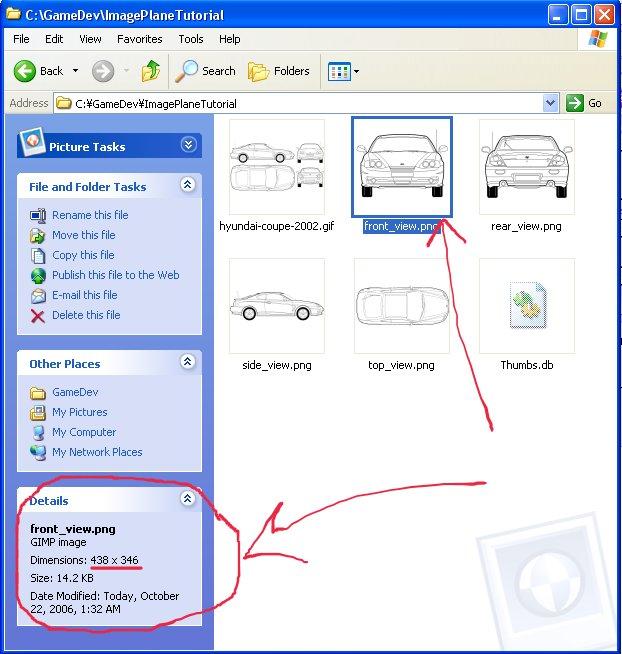
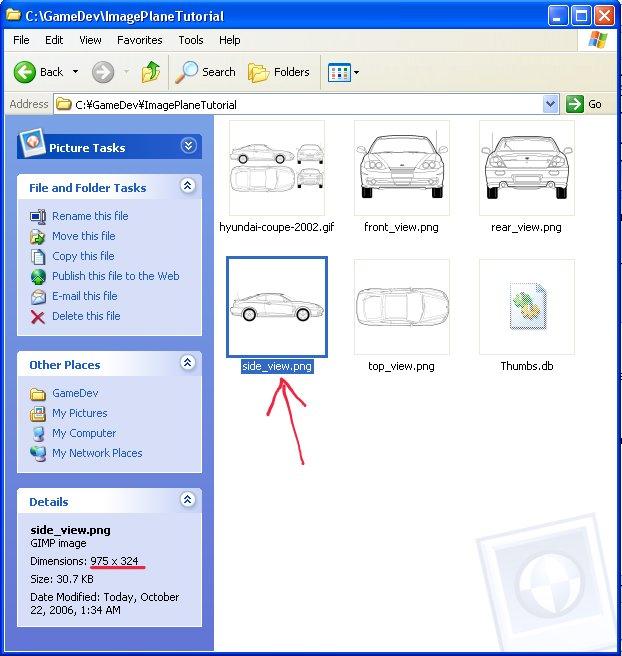
Pull up Windows Explorer or "My Computer" and browse to the directory
where your images are stored.
Select the image, then check the "Details" pane on the left side.
You may have to click the expand icon to see it like in the image below:
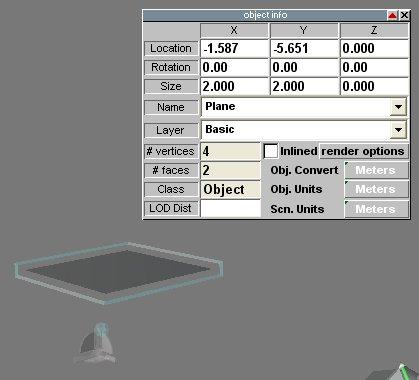
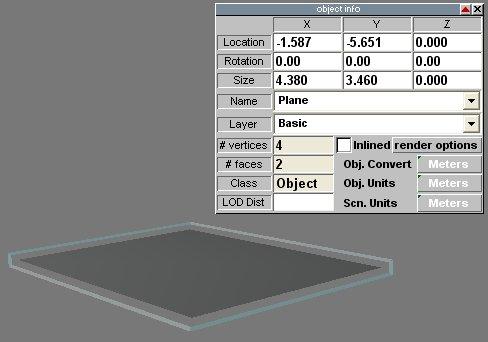
Go back to trueSpace and enter the width and height values for your
image in the object information box for the plane, but divide them by 100
or 1000 so that you get a more reasonable number.
In my case the front_view.jpg image was 438x346 so I entered 4.38 and
3.46.
Basically you want your plane to be the exact same ratio as
your image that you are going to map to it:
You can go back to Perspective view by selecting the angled house on
the same flyout bar where you found the Front view icon:
Your object info panel should now show the rotation values at 0.0, 0.0,
0.0.
Rename the image plane and save it to your object library.
Next I'm going to make the side view.
Copy the current image plane by pressing Ctrl-C or by clicking on the
Copy icon:
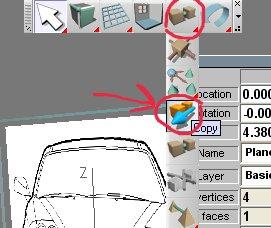
Rotate the copy -90 degrees in Z axis:
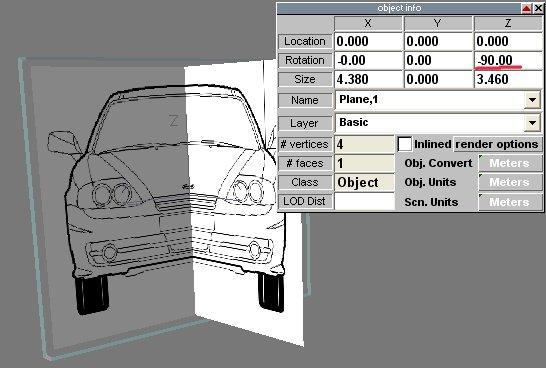
Normalize the rotation as done above: Click Axis icon. Click Normalize Rotation Icon. Click Axis icon. This will set the rotation back to 0,0,0 while leaving the plane rotated.
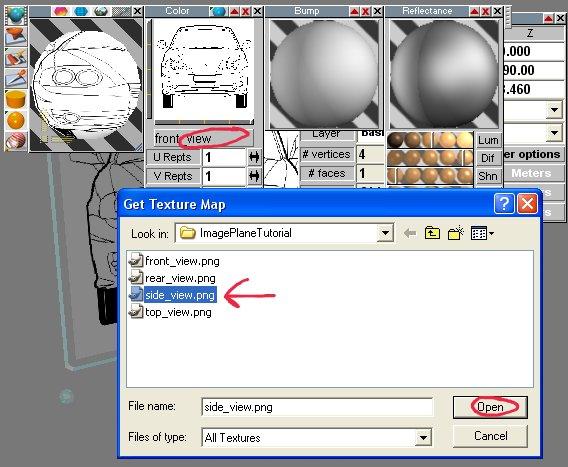
Bring the material editor back up and right click on the button to choose
another bitmap for the texture.
Browse to your image location and choose the side image:
Click the Paint Object icon again to paint the side image onto the plane for the side view:
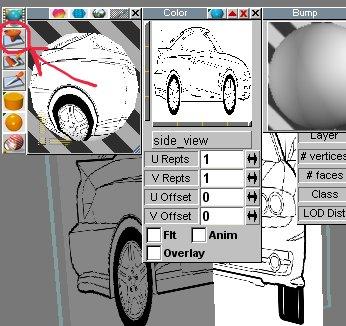
Close the Material Editor.
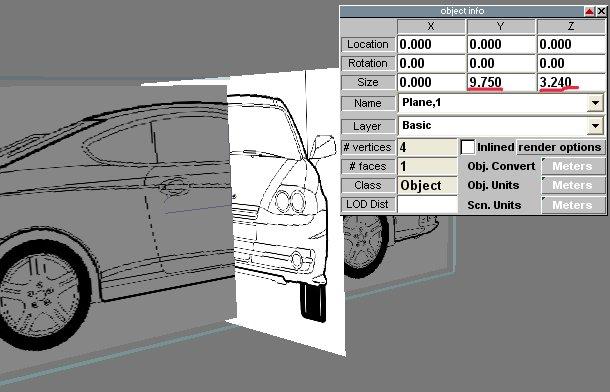
Go back to Windows Explorer and get the height and width for the side view image:
Enter equivalent dimentions into the Object Info panel with the side
plane selected.
In my case the side image was 975x324 so I made my dimentions 9.75
and 3.24:
In my example and likely in many of your own, the images don't line up completely perfect. So I'll need to move the image up or down a bit to completely line it up. Some times you may need to scale one of the the planes as well. This all depends on how careful you were when making the image planes in the first place. The more accurate you are in your image processing application the less work you'll have to do in tS to line everything up.
When you are happy with the position. Rename and save the side view to the library. Repeat for all your aditional views.
Some times it is hard to model with the image planes directly in the center of the workspace so I'll move them back in an axis perpendicular to their orthographic view. The Front view for example I'll move to -10 in Y and the side view to +10 in X. They still show up in the same place in the Front and Side views but are no longer in my way when modeling. Also you will want to Lock the layer that the image planes are on and do your modeling on a separate layer. That way you don't accidentaly move or select the image planes:
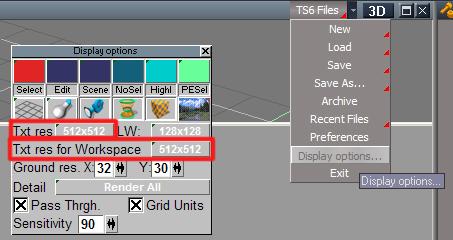
If your images are not displaying very well, you may want to check and
see what your texture display size is set to. Click on "TS6Files" from
the main menu and choose "Display Options".
Then make sure that "tex res" and "tex res for Workspace" are both
set to at least 512x512:
Hope someone out there finds this useful.
One more useful tip:
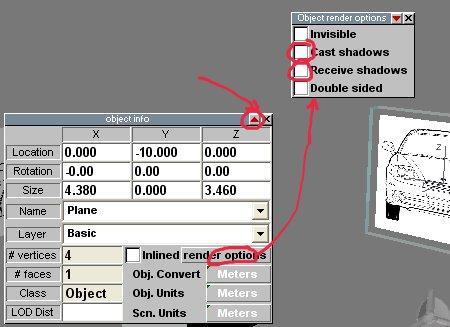
Bring back up the Object Info panel for the image plane. If only the
basic info panel is showing up, you can expand it by clicking on the red
triangle at the top of the panel. Then click on "Render Options". This
will bring up a pop up dialog called "object render options". By unchecking
the cast and recieve shadows boxes you can make the image planes not cast
or recieve shadows. ;-)
If you're working with tS 6.6 or lower you may also want to use the
"constant shader" in the reflectance chanel since that will prevent the
scene lighting from affecting the image planes at all.
It does bring up a good point though, what if your side image is facing
the wrong way?
Solution is to use the current side view for the opposite side. ;-)
Just rotate it 180 degrees in Z, and move it to -10 X instead of +10 X:
To fix the view for the current side, just horrizontally flip the image
in the paint program, save out to a new file, and load that in as the texture
map:
I though about flipping the UV coordinates but the problem is that
unless I'm missing something, tS really doesn't have any tools to accurately
flip uv space.... so just creating a second image horizontally flipped
is a much simpler solution.
The Wicked Witch Of The Web wrote:
"As someone who's had a bit of experience recently with image reference
planes (!!!!) and ran into that exact situation on more than one occassion,
there's two very simple options. One, if the plane is double sided, you
can just rotate it 180 degrees and look at the other side! Two, flip the
texture in your painting program (PSP, PShop, etc) and re-save (with same
name). TrueSpace will just reload the corrected image . "
Jack Edwards wrote:
"The two sided image planes can save some time and effort and are how
I've normally done it in the past, but they don't really work when you
need right/left or front/back views that are different. By using the single
sided planes, the "wrong" side wont be visible when looking at it from
the opposite orthographic view.
Another interesting way to set image planes up would be to do a cube primitive, scale it to the right dimentions, flip the normals so that it shows inside out, then map each of the faces with the different image maps. Of course that would require quite a bit more care in the construction of the images for the image planes....
I've also seen it done where artists use the image planes to construct NURBS spline outlines, then hide the image planes and use the spines as 3 dimentional guides to help them figure out where to place their polys. "
Graysho wrote:
"You can mirror the uv-plane in the uv-editor by dragging the left
side over the right side and readjusting to fit the image. Or you can rotate
the projection plane 180° while still active (after you click planar
uv-projection).
One thing you left out and is very helpful is the "Draw object as solid" button. If activated for the image planes, they are drawn as solid, no matter what drawing mode you are in (wireframe etc.). You can access this function by right clicking on the blue sphere of the manipulator cage (3D controls must be activated in preferences), or you simply use the icon finder and drag the button to your workspace (CTRL+drag). " :

Originally posted 10_22_06