 |
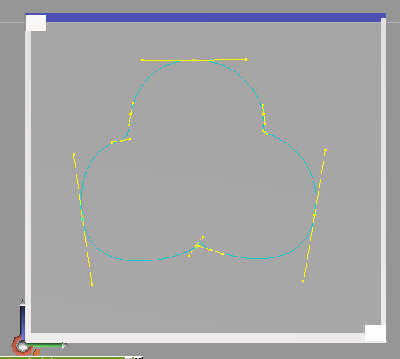
First, open a top view and then click the 'Add Polyline' icon. Draw the outline of a cross-section of the rope.Adjust the control handles on each point as needed. When you are satisfied, Save this curve into the Curve Library. |
|
First, open a top view and then click the 'Add Polyline' icon. Draw the outline of a cross-section of the rope.Adjust the control handles on each point as needed. When you are satisfied, Save this curve into the Curve Library. |
| Now, ordinarily I would next draw another curve, from one end of the rope to the other; to use as a rail, and rail or 'sweep' the cloverleaf along it. However, this doesnt allow for putting a twist into the equation. Go ahead and Draw a Curve where you want the rope to be; this will be used as a guide for the next steps. |
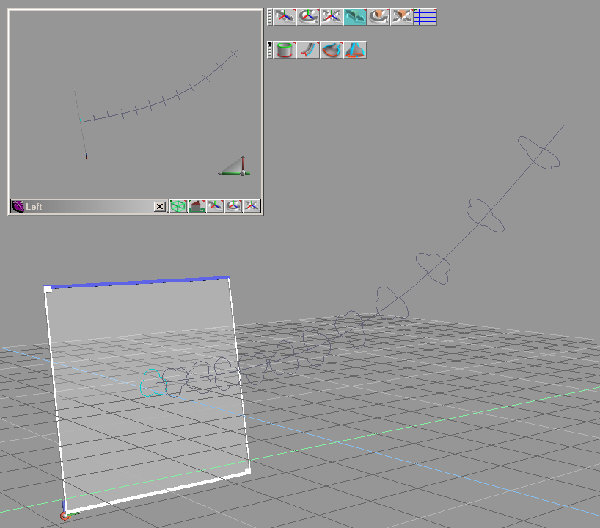 |
So, my next tactic was to use the Skin Surface tool. Start by left and right clicking Grid Mode. Default rotation is 45 degrees, which is fine. Then, select and copy the cloverleaf curve, first moving it up, then rotating it one 'click', always rotating it in the same direction.Continue in this manner along the desired length of the rope. Now for the 'fiddly bit'; using the curve drawn as a guide earlier, line up each curve cross section along it's length. It may help to select the whole group of curves and rotate them en masse to a position close to the guide curve first |
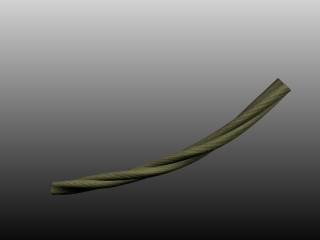 |
When you are satisfied with the placement of all the cross sections, save the scene in the scene Library so you can return to this point if things dont work out. Click the Skin Surface icon. It will ask you to pick the first curve, pick the one on the bottom end of the rope, and then choose each remaining cross section in order. End result? A twisted NURBS rope! Not as easy as I had hoped, but not impossible. |
| How about a different method? | Let's try it with Subdivision Surfaces |