1
 |
|
|
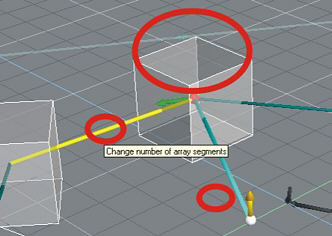
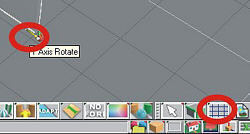
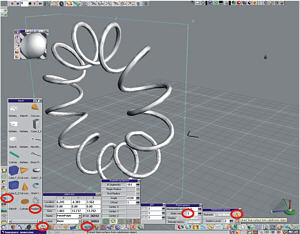
Open the object info panel with a
r-click on the Object tool. Place a default cube (set units to meters)
on the grid and click on the Radial Array tool. R-click on the Radial
Array tool while you are in the area to bring up the properties panel.
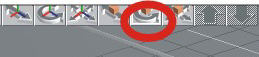
Click and drag away from the cube to create the default array. R-click
on the array to expose the manipulator. On the Radial Array properties
panel make sure that “Toggle Circle” and “Toggle Follow Path” are
pressed.
Overall screen
Open Object Info Panel with a right click
"Toggle Circle" and "Toggle
Follow Path"
|
| |
2
|
|
|
Close-up from previous screen - shows placement of
cube, click drag location to create
the array, and then the manipulator to increase the number of items
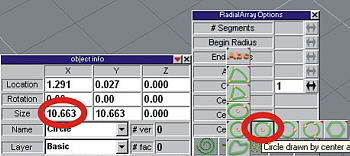
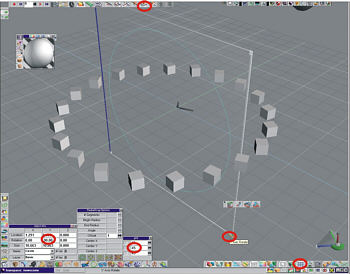
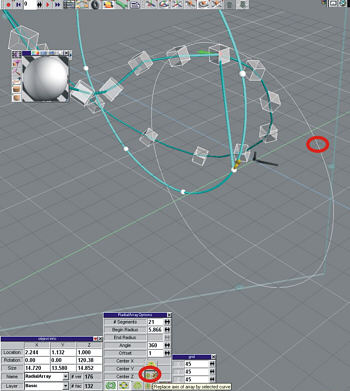
Left click drag to the left on the
manipulator as shown above to increase the number of cubes to 21. Does
not matter as it will change later but it gives us something to work
with. Click on the hierarchy down arrow to select the primary cube and
scale it down using the manipulator. You will have something that looks
like below.
|
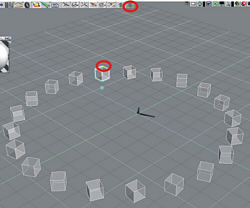
Overall screen, after scaling |
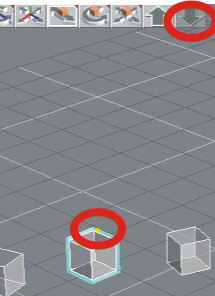
Click "Hierarchy down" and scale one cube |
|
| |
3
|
|
|
Create a 2D circle curve with a
click drag. Mine ended up around 10 meters in diameter.
Overall screen, with the circle in the 2D draw panel
Close-up of the settings
|
| |
4
|
|
|
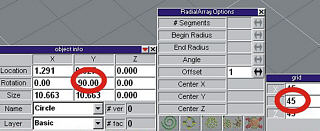
Turn on the grid tool and r-click
on it to bring up the properties panel. Turn on rotation and set it to
45 if it is not already. Use the draw Panel manipulator to rotate the
curve 90 degrees. It should be two snaps as each will be 45 degrees.
Notice the rotation change in the Object Info panel. Turn off the Grid
tool.
Activate rotation (top of overall screen)
Overall screen
|
Rotate to 90 degrees, with grid snap of 45 degrees |
"Grid Snap" icon, and draw panel manipulator |
|
| |
5
|
|
|
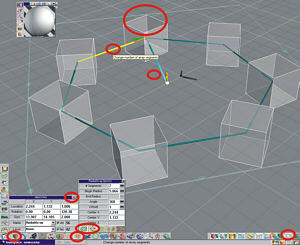
Left click on the array to select
it and then Right click on the array to activate the controls. Click on
the Replace Axis tool and select your circle curve. It looks really
weird at the moment but don’t worry, here is where the magic begins. You
can delete the circle now if you would like.
Overall screen after replacing the axis - looks weird!
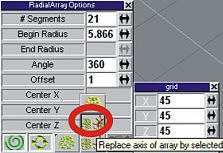
The "Replacing axis" icon, bottom of overall screen
|
| |
6
|
|
|
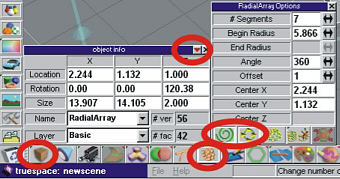
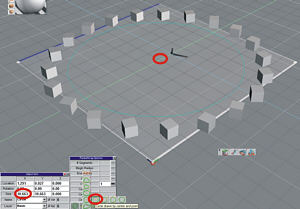
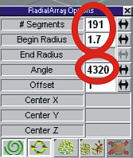
Now, in the Radial Array control
panel type in *12 after the 360 entry (360*12) for the Angle and press
Enter. The math is done for you. Set the # of segments to 191. Must be
an odd number. Set the Begin Radius to 1.7 or something close. Now this
looks a little more like something we would expect. Play with these
settings and experiment a bit. If you want a Torus Coil made up of
separated parts you can skip the next three sections.
|
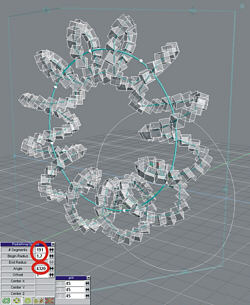
How things look after typing in some settings |
Here's the Radial Array info panel (close-up of
bottom left of other image), showing the settings that were entered |
|
| |
7
|
|
|
To create a continuous solid torus
coil, first click on the Create Copy of Path tool. A curve will be
crated through the Path of the array. Move the Path in X a little so you
can see it better.
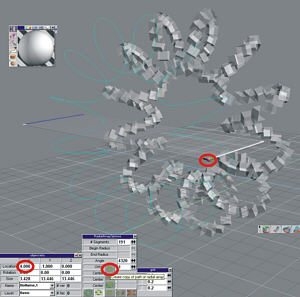
A look at the overall screen

The "Create copy of path of radial array" icon, with
the x location adjusted so it can be seen better

The manipulator icon, which you can use to move the x
location of the copied path
|
| |
8
|
|
|
Create a small regular polygon and
loft it around the torus coil curve by selecting the Loft tool and
clicking on the coil. Note that the polygon will disappear. Save your
curve to the curve library first if you want to experiment with
different sizes of polygons.
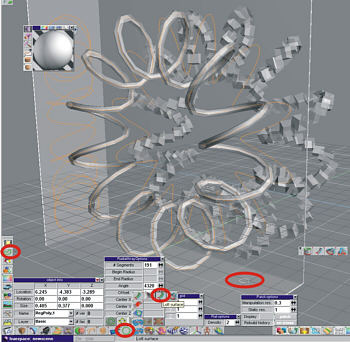
Overall screen, showing small polygon lofted along the
copied path
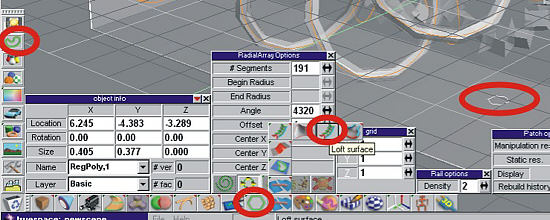
Close-up from above - note the small polygon on the
right of the image (with the create polygon icon highlighted in the
centre), and the "Loft Surface" icon. To the left is the Curve
Library,
where you can save your curve for experimentation.
|
| |
9
|
|
|
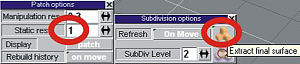
Save your array to a library if
you want and delete it from the scene. You can leave your coil as a
NURBS object but I converted it to a Polyhedron with the Convert Nurbs
Patch tool. A R-click on the tool will bring up the properties. Set the
Static res. to 1 before you convert. I applied a single SDS operation. A
R-click on the SubDivision tool brings up the property panel of the SDS
tool so you can extract the mesh. This gave me the hand drawn wire look
I wanted.
Overall screen
|
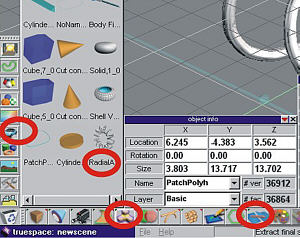
Close-up of bottom left - the convert NURBS to
polygon icon is on the right, with the SDS icon in the centre, and
the object library (and icon) over on the left |
|
The conversion settings for NURBS to polygon, and
extracting the final surface from the SDS object. |
|
| |
10
|
|
|
Rotate in Y 90 degrees and
normalize the location. Create a torus primitive (Riclick on the tool to
bring up the settings) and normalize the location while it is still
active. Then left drag on the red part of the ring to adjust the radius,
left drag the tan part to adjust the Spherical Radius, and R-drag the
blue diamond to adjust the resolution. My settings are as shown in the
image.
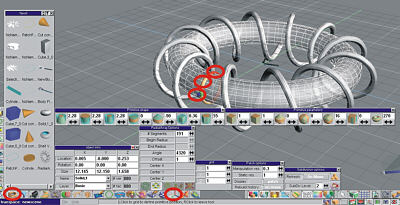
A look at the overall screen

To the left is the "Create Torus Primitive" icon, and
on the right, the "Normalize Location" icon


The Torus Primitive Settings (split into two here for readability)
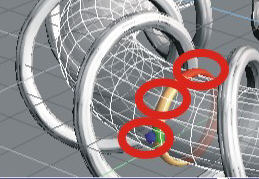
The magic ring in close-up - adjust the look of your
torus using this
|
| |
11
|
|
|
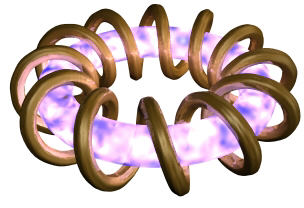
Your Torus Coil is now complete
and ready to be textured and rendered. I used the Copper metal from the
“Metals” material library and a modified Fire Ball material from the
“Materials” material library as shown. R-click in the library window for
your options.
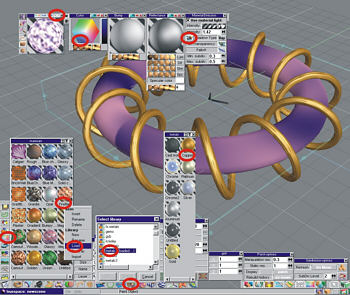
The overall screen for texturing (real time display)
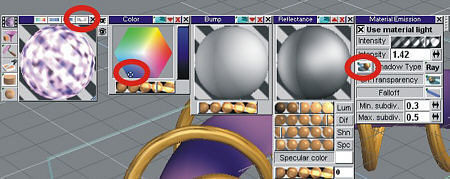
A close-up on the material settings - note the
Material Emission icon on the left, and the Material Emission settings
panel on the right
|
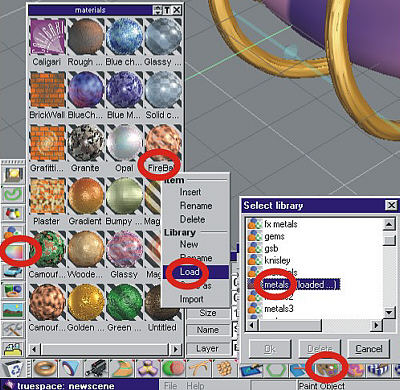
A close-up of the material libraries |
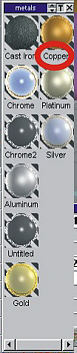
Choosing the copper material from the "metals"
library |
|
| |
12
|
|
|
I hope you had fun with this
little tutorial. The technique is quite powerful and really amazing to
experiment with. Until next time!

Another render of the finished object!
|
| |
|
|
|
|