Click the Workspace tab.
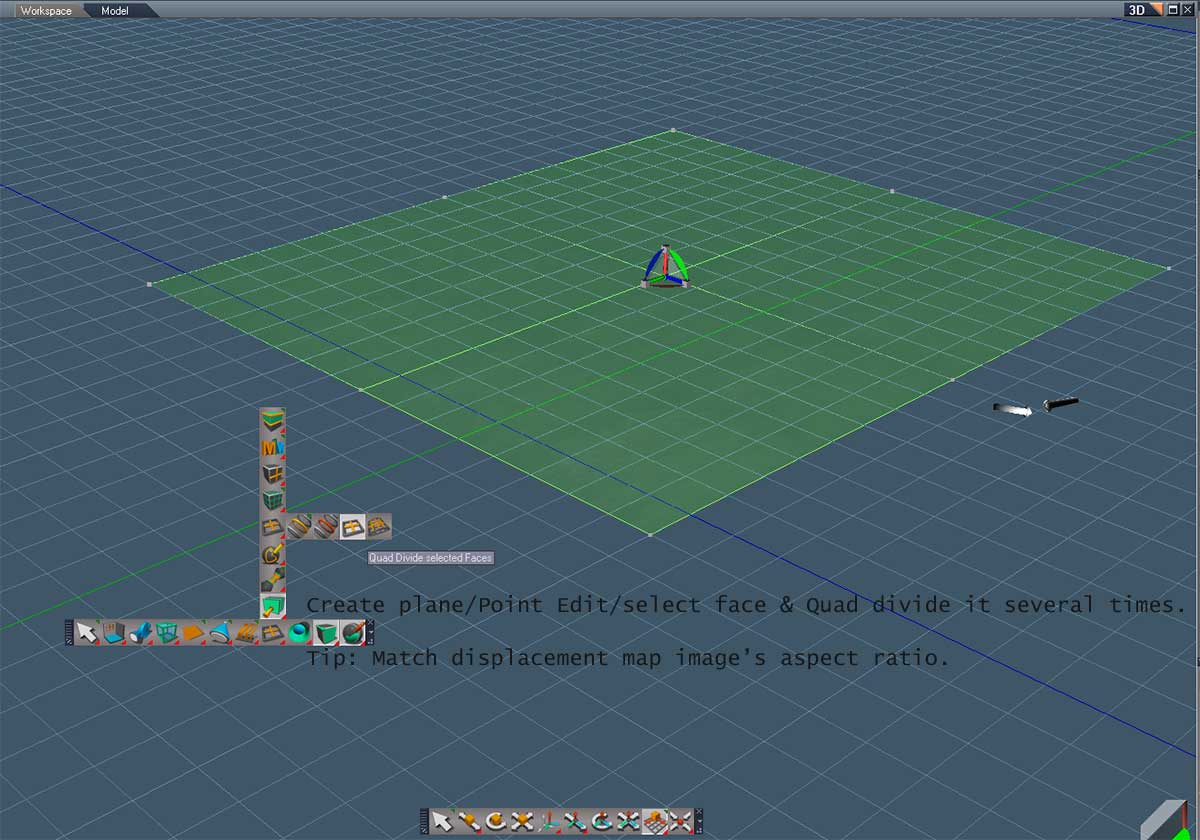
Create a Plane Object.
Right click the Plane to enter Point Edit mode. Select the top face.
Click the 'Quad Divide' icon several times until the face is thoroughly subdivided.
Left and right click the 'Map Displacement' icon. Click 'Panel' tab in the stack.
If you know the aspect ratio of the displacement map, set the plane's size to match-
i.e., if the map you want to use is 800 X 600, set the plane's size in the Object Info panel to 8 X 6.
To scale the object up or down, first toggle on 'Grid Snapping' to help preserve the aspect ratio.
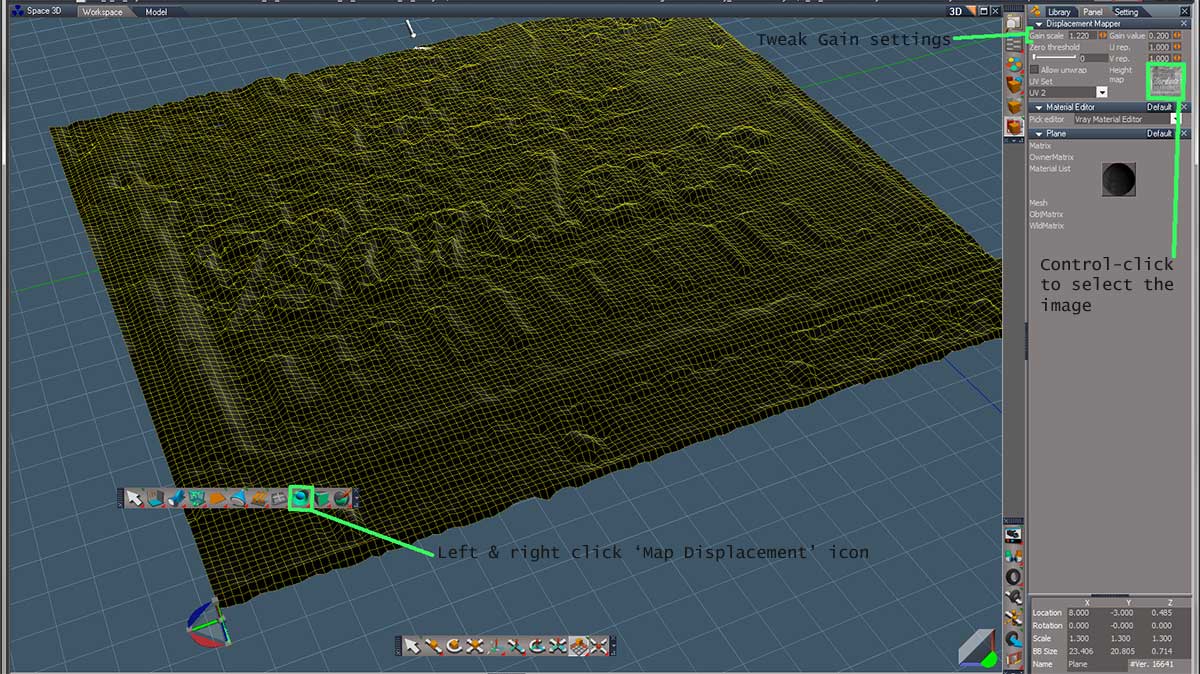
In the stack view/settings panel, Control-click the indicated area to browse for and choose the displacement map.
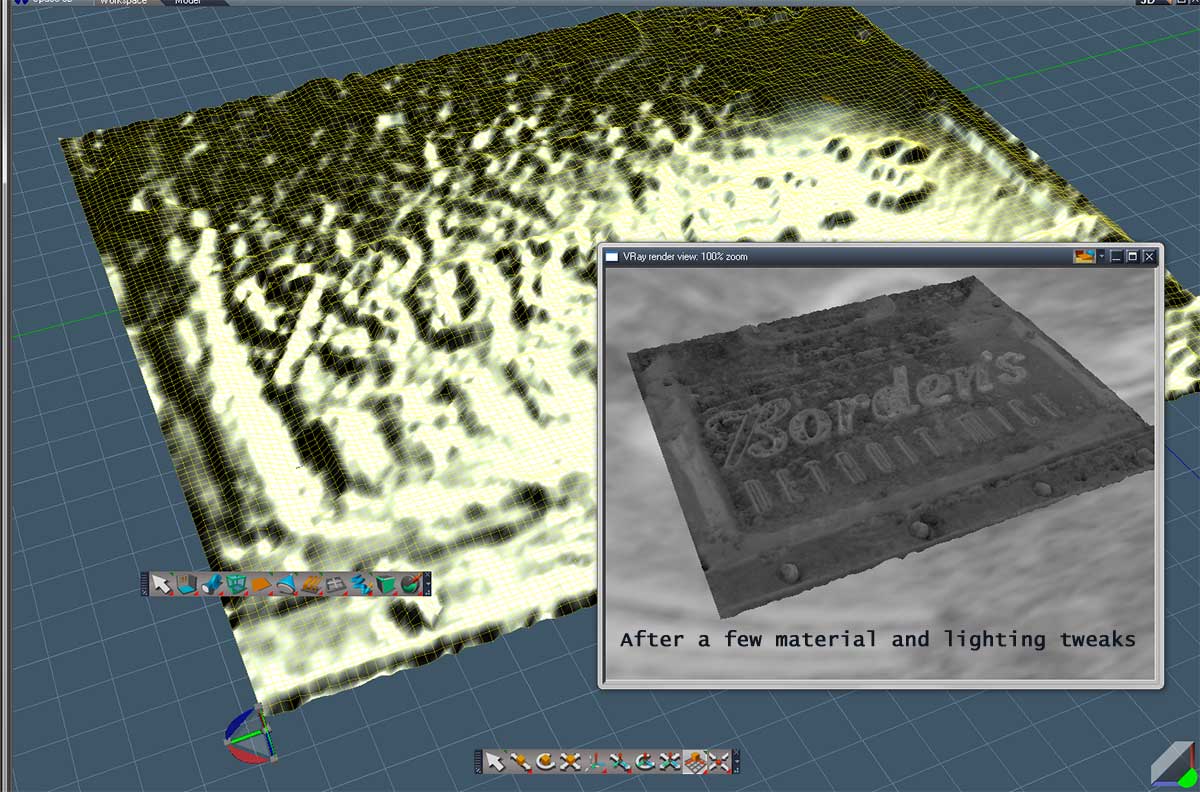
Adjust the Gain settings to desired effect. Negative Gain Values will 'indent' the map, positive values will 'bump out' the pattern.
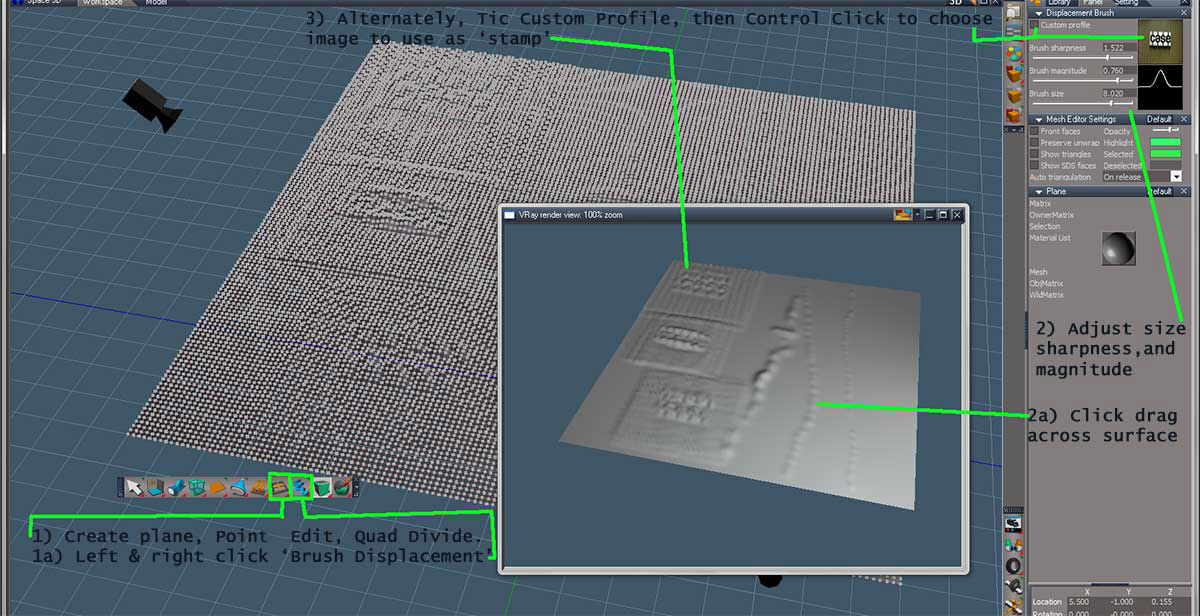
Now on to the Displacement Brush tool
Once again, start with a plane that has been Quad Divided multiple times.
Left and right click the Displacement Brush icon.
Open the 'Panel' tab in the stack if it's not already open.
You can use an adjustable brush tip or an image with the Displacement Brush.
Start with the adjustable tip- tweak Size, Sharpness, and Magnitude settings to desired effect.
Click-Drag across subdivided plane to create displacement.
To use an image map as a 'stamp', tic the 'Custom Profile' box, Control Click indicated area to browse for and load an image.
Click and hold or drag on the subdivided plane to create displacement.