Modeling the dragonfly;
The legs.
Modeling the dragonfly;
The legs.
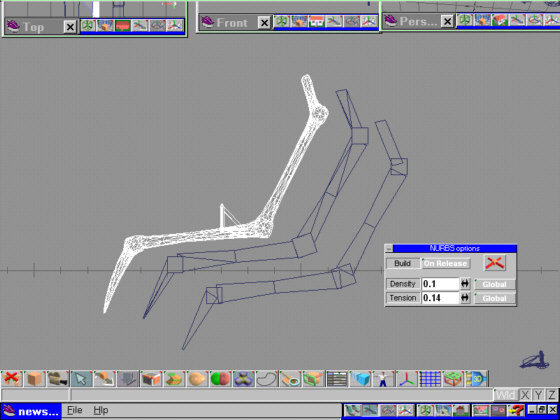
The legs were the final thing I needed to model to complete
the dragonfly. I used some photos I found on the Internet for reference.
The joints are simple cubes, and the limbs are a swept cube, with the middle
'floor' scaled smaller and the end faces scaled larger. The joint
cubes were scaled slightly wider than the limbs. Position them, then boolean
them all together. This object was then 'NURBed'. Right click on the NURB
button to set the options- I turned the density to .1 and the tension to
.14. A left click on the NURBs button converts the simple object into a
nurbs object- nice and smooth. This object was saved, then loaded into
the main scene. Position, then copy. Scale slightly larger, and rotate
a bit so that the first and second leg don't overlap. Repeat for the third
leg; for the other side of the body I used the mirror tool to create three
more legs. Axis placement is important when using the mirror tool- I moved
the axes of each leg up to the point where the leg would intersect the
body. From looking at my reference photos, I placed two legs on the bottom
of the 'neck' section, and the other four legs on the thorax. I set up
my viewpoint, then rendered a test image. The result is below.
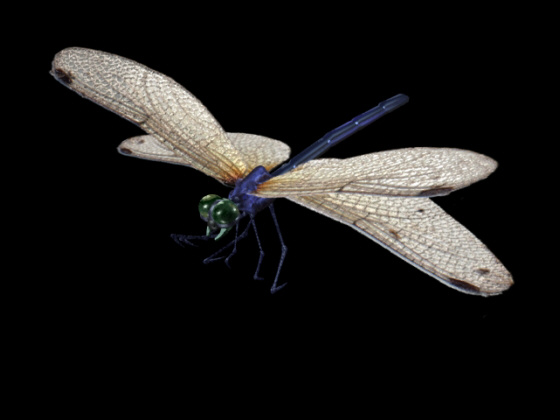
Here is a shot of the dragonflies cruising across
the
Lilypad image
Author's home page.
Return to start
Return to main tutorial page
Return to The Cabin Annex