1
 |
|
|
Click on the rounded polygon cube
from the primitives list. While your mouse is still in the area R-click
on the active icon to bring up the properties.
Your cursor will be in creation mode. Note the little yellow box tagged
to the cursor.
Click on the grid close to the center and a primitive will appear. The
multi-colored band running through it is your magic ring that you will
use to manipulate the parameters of the rounded cube. (In trueSpace, you
can use the mouse
scroll wheel to zoom in).
in)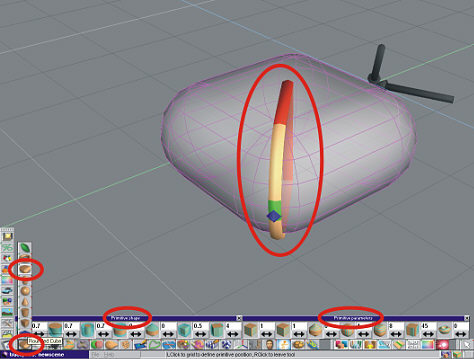
|
| |
2
|
|
|
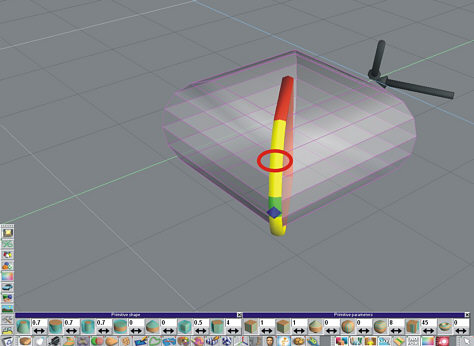
Right drag to the left on the tan
part (turns yellow on mouse over to show it is active) to reduce the
division or sharpen up the corners.
|
| |
3
|
|
|
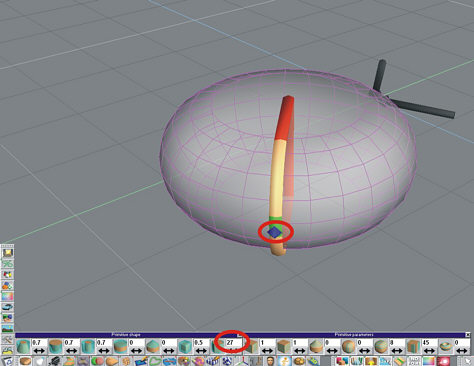
Right drag to the right on the
blue diamond to add more divisions. Watch the far right setting on the
Primitive Shape tool bar that opened up when you R-clicked on the
primitive icon as you do this. Stop when it reads 27. Right click on the
Grid to exit creation mode.
|
| |
4
|
|
|
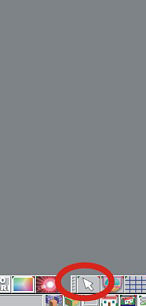
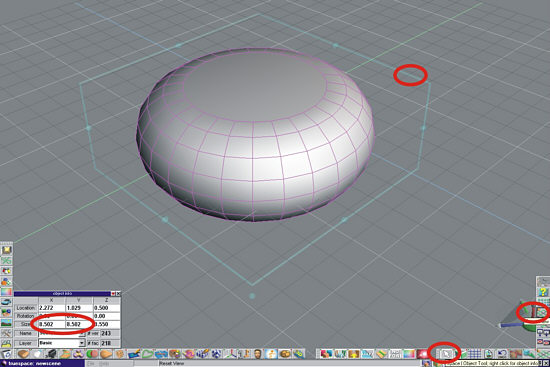
You now have a tire blank. Right
click on the Object tool to bring up the Object Info panel.
Left and Right button drag on the corner section of the Navigation
control and scale up the size of tire blank till the Object Info panel
reads 8.5 or something close. You can type it in directly in the Object
Info panel as well. If you zoomed in then reset the view with the reset
view button first.
|
| |
5
|
|
|
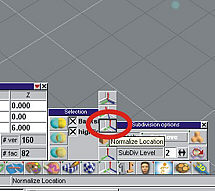
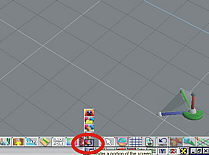
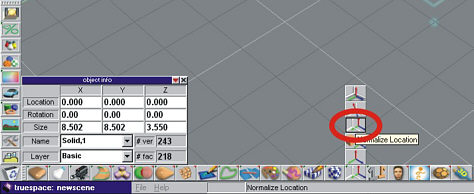
Click on the Normalize location
tool to center the object on the grid.
|
| |
6
|
|
|
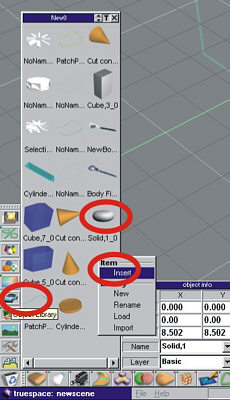
Save it to the Object Library for
future use. Open up the library and right click in the library window
and select insert.
|
| |
7
|
|
|
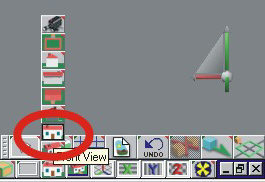
Switch to the front view.
|
| |
8
|
|
|
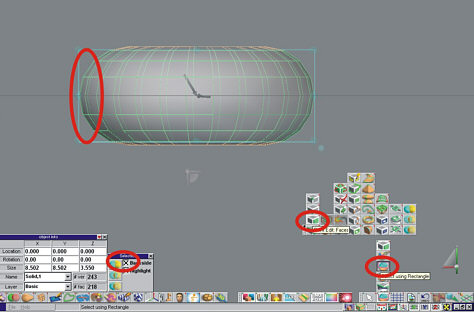
Right click on the tire blank to
bring up the edit tools and select the faces mode.
Activate the fence selection tool with a click on it and Right click on
it to open up the settings. Make sure that backside is checked.
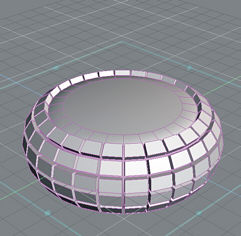
Drag a box around the faces leaving out the top and bottom ones. You
will end up with 6 rows of the middle selected.
|
| |
9
|
|
|
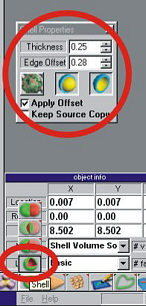
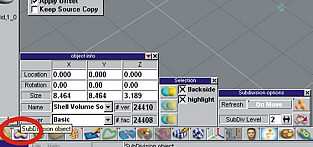
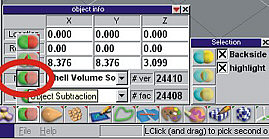
Right click on the Shell Tool to bring up its settings and set them as
shown (Thickness set to .25, Offset set to .28, Shelled volume pressed,
Apply offset checked).
Click on the shell tool icon and then click on the Object tool to set
the operation.
|
| |
10
|
|
|
You now have two objects. Delete the one called “Shell Solid”, which
will be the active selected object. Select the remaining object called
“Shell volume” and return to the perspective view.
|
| |
11
|
|
|
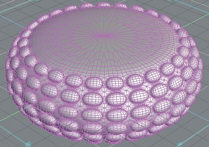
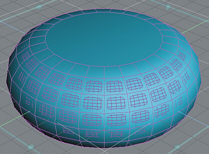
Click on the Surface Subdivision Tool (SDS) to smooth out the tire.
While there Right click to bring up the settings.
|
| |
12
|
|
|
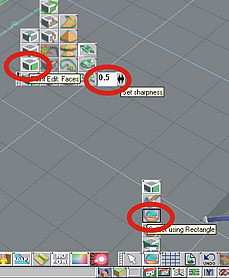
Right click on the melted object to bring up the SDS edit tools.
Select the faces mode and use the fence selection tool to select all the
faces on the object.
Set the sharpness to 0.5
|
| |
13
|
|
|
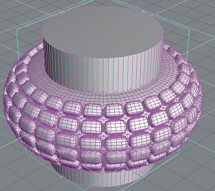
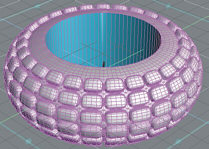
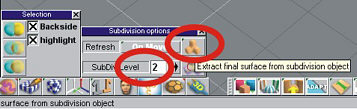
Right click on the grid to exit the edit mode. You know have the base
for a high resolution knobby tire. For an extra high resolution tire set
the division level to 3 on the SDS settings.
Extract the final mesh from the SDS settings.
|
| |
14
|
|
|
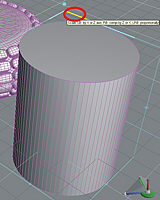
Select the cylinder primitive icon. Create a cylinder on the grid with a
click. Give it 80 sides (really doesn’t matter just make it a lot) by
Right dragging on the blue diamond. Remember to Right click on the
cylinder icon to bring up the settings.

|
| |
15
|
|
|
Exit out of creation mode with a R-click on the grid or hit the space
key. Scale it up to 4.8 in diameter and tall enough to pass completely
through the tire. A height of 6 will do.
|
| |
16
|
|
|
Normalize the location of the cylinder.
|
| |
17
|
|
|
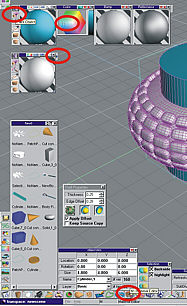
Open up the Material Editor and expand it by clicking on the tab on the
upper right side.
Set the color (I used a blue) to anything you want and click on the
Paint Object tool.
|
| |
18
|
|
|
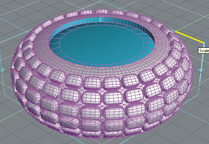
Now select the tire again with a click and start the Boolean subtract
tool. Click on the blue cylinder and it will be subtracted from the
middle of the tire.
|
| |
19
|
|
|
Now go to the library and click on the tire blank you saved there. It
will appear on top of your knobby version.
Paint over it with the blue texture or change it if you want to
something else. I left mine blue.
|
| |
20
|
|
|
Scale it down to 6.5 units - this can be done either by holding both
mouse buttons down and dragging on the corner of the cage, or by
entering the numbers directly in the Object Info Panel.
|
| |
21
|
|
|
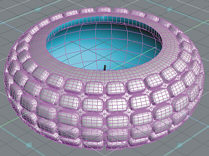
Subtract it out in the same manner as you did the cylinder. Hit the
space bar or R-click on the grid to exit subtraction mode.
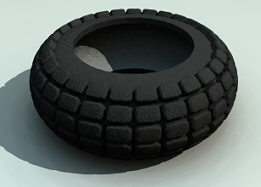
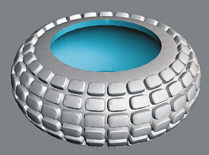
There you go. A high res knobby tire ready to texture and use in the
scene of your choice.
|
| |
22
|
|
|
Save it to the library and do a test render with the area render tool by
clicking on it and dragging a fence around the tire.
|
| |
Summary!
|
|
|
Compare your creation with the sample in the “More Objects” library that
can be found with a right click (are you getting the idea yet?) in the
library window and by selecting load.
I hope you had fun with this neat
trick made possible by the Shell tool and SDS with a little help from
Booleans!
|
| |
|
|
|
|