A tutorial for UV Cow UV Mapper
![]()
Texturing with UV Cow
As I promised here's the first UV Cow tutorial, intented to show you the power of the plugin in its practical use. I believe that you got familiar with UV Cow GUI by now. OK.
I had a hard task to model and texture a statue of the dragon for Virtual museum project. Since the model was used for RT interactive presentation I needed to achieve most detailed texturing, but even more important, I needed to use only one texture for the whole object.
Before I mostly used some basic UV mapping techniques (and exported bitmaps with Unwrapper or UV Rip plugins) and Tru V for some more complex models with only one texture map, but as we all know Tru V supports only planar mapping so far and I wanted to use all available mapping projections directly from tS. Sometimes while texturing low poly objects in tS 4.x, I used "Projection per face" tool oftenly, which alowed me to map different groups of polygons. But it was impossible to get better results with more complex models that way.
Let's get back to the theme.
STEP 1
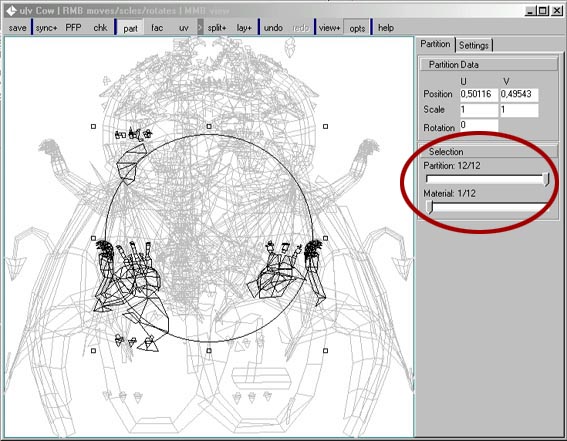
I made a low poly model of the dragon and I was about to start texturing. I had a number of photos of the real object so I decided to use textures from them. First I needed to carefuly choose the pieces which I wanted to split later in the "Cow". :)) Since there is the option which enables splitting the whole projection image by assigned materials (pict.1), I decided to use "Paint face tool" and painted each part I wanted to split, with different colour (pict.2).
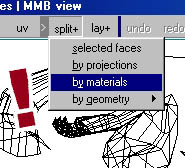
pict.1
pict.2
There's no need to tell you how it can be boring painting polygon by polygon. So here's the tip - you can use "Lasso" or "Rectangle" tool to select most exposed group of polygons and after selecting, simply press "Paint face tool" and tS paints all of the selected faces automatically. Then you manually paint the remained polygons and repeat the process for every different part of the model. Take a look at the picture below to see how I painted the dragon:
pict. 2a
STEP 2
We're now ready for the further steps. In step 2 I'll
try to explain how to set up partitions of the object for UV projections.
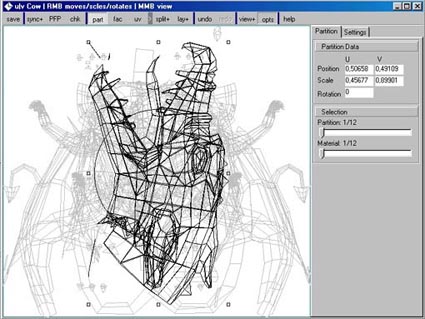
Open UV Cow. You should see something that looks like a deadly drunk
spider's masterpiece (pict. 3). We need to clean up that mess at the first
place. Use option split/by materials (pict. 1) to break the object into small
pieces previously defined with different colours. Then open the control panel by
clicking the opts menu (pict. 4).
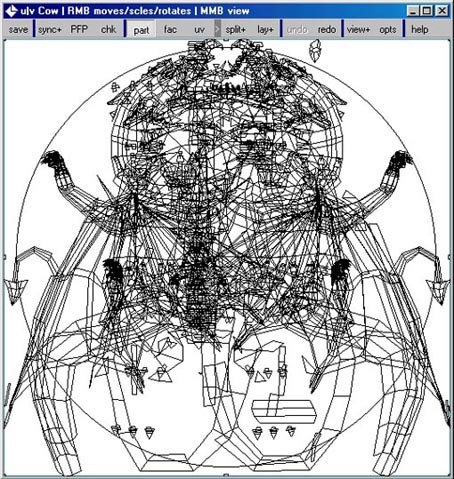
pict. 3
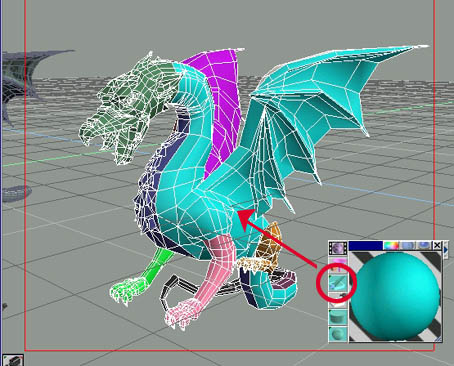
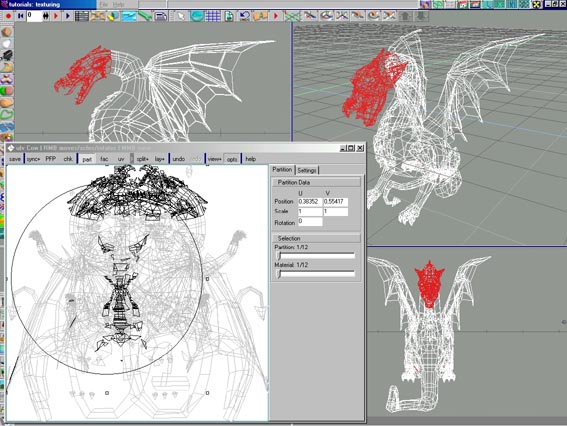
In control panel click the partition tab and take a look at the selection panel (pict. 4). You'll spot two sliders. Grab the "partition" slider and move it left and right. You'll notice how different parts of the object in the left working area get selected. Now grab the UV Cow window and move it aside so that you can see the model in tS's "perspective view" (pict. 5).
pict. 4
You'll see that group of polygons (red selection on the screenshot below) changes dependently of what partition you've chosen in UV Cow's selection panel. I have painted the dragon object with 12 different colours, therefore I got 12 partitions after splitting the object in UV Cow. Take a look at the picture below again. The partition looks shapeless as well as every other part of the object, therefore we need to assign new UV projection to every part.
Partitions are groups of faces in UV map that
logically belong together (like various parts of object that have same material
or projection). When you start whole UV map is a single partition, but during
the work these are split it into several smaller ones.
pict. 5
STEP 3
Well, if you haven't get tired of my confusing explanation it's time now to assign UV projections for every partition, as I promissed on the previous page. Choose one of the partitions. In my case I'll choose dragon's head. Click on "PFP" button, which enables you to work in tS directly without switching off the UV Cow window.
PFP stands Per Face Projection. When pressed it saves current state of the UV map. After you have done some mapping and press refresh the changed UV map that object will be compared to the saved one and Cow will reload the changed parts. If you don't use the PFP button and change the projection in tS, it should still be OK, but you might loose last editing (the message with details will appear when that happens giving you an option to restore old state).
Your UV Cow Window should be looking something like this:
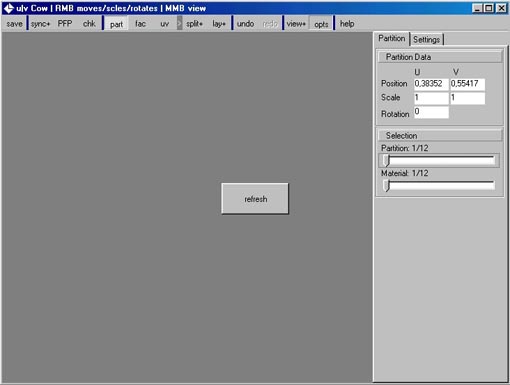
pict. 6
Now go to the tS's working space and click the desired UV projection button. For the head I used the planar projection and placed it from the side (pict. 7). I highlighted the projection plane on the picture with yellow, for better viewing. For some other parts of the object I used different projections, from spherical to cylindrical.
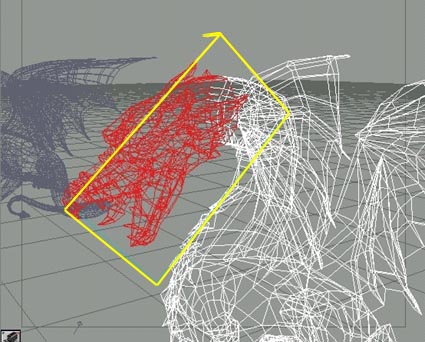
pict. 7
Now switch back to UV Cow and press refresh button. You'll notice how previously shapeless form now gets the right form. Dragon's got it's head again (pict. 8).
pict. 8
Now you repeat that procedure for every partition of the object.
STEP 4
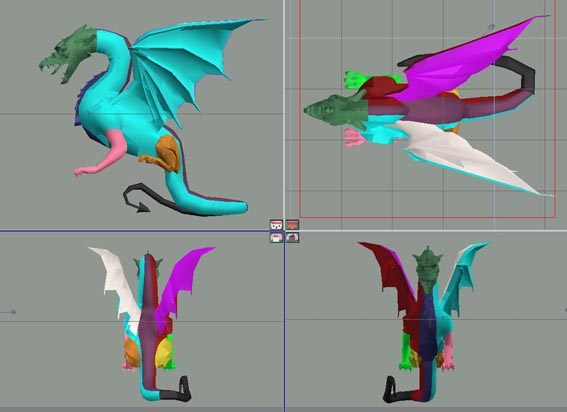
Now, that we've assigned all UV projections, we need to arrange the partitions for exporting to our favourite picture editor. We can now turn and twist the partitions to the right positions. Sincerely I was not too economical with the space in this case. But here's how I arranged different parts of the dragon for further steps (pict. 9).
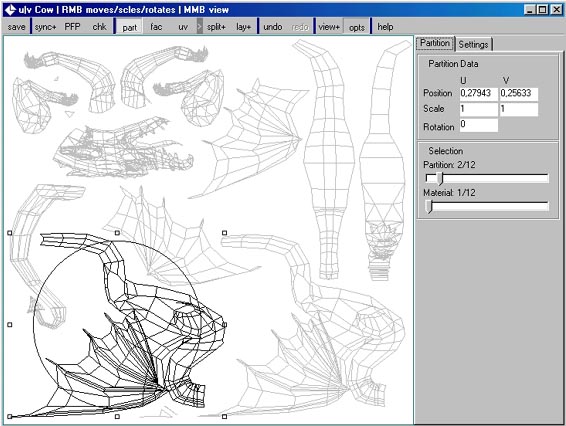
pict. 9
By clicking "UV" button, you can arrange positions for each single vertex of the partition. Before that, you can also click the "view" button and choose "frame selected" option, to zoom in the selected partition for easier editing (pict. 10).
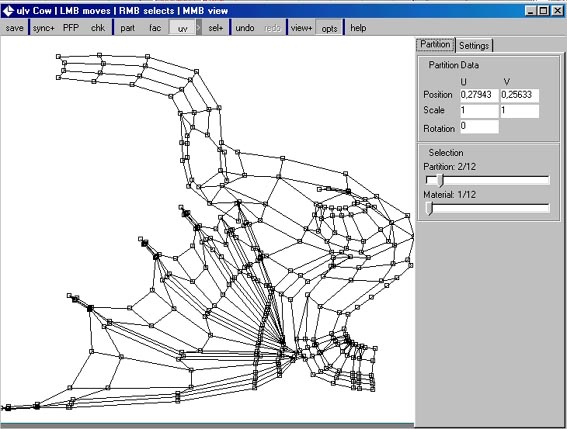
pict. 10
Later when you have the map finished and the object textured, you can press the "view" button and choose "show selected texture" for even better editing (pict. 11). In this case, you can preview changes in real time. In control pannel you click on settings tab and setup the parameters in synchronisation panel (follow the arrow on the image below). Before saving our work as a bitmap format for picture editing, we can perform mesh melting operation. UV cow now keeps the partitions arranged but updates the changes made in the polygon count. Now you can save the map.
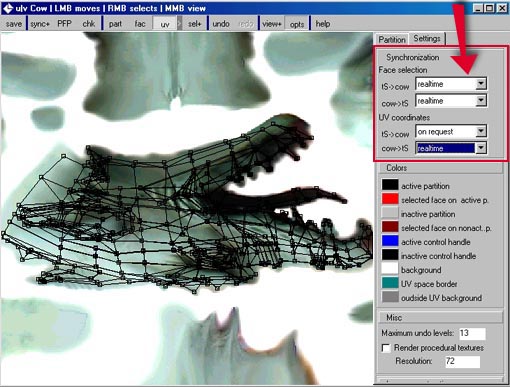
pict.
11
Please remember. There are many other ways to use UV Cow.
As I said on the beginning, this is only a short tutorial to hopefuly give you some ideas for the start.
I believe all of you will surely find much better ways to use this great plugin. In the future I'll add some tips for map painting in Photoshop.
And one more thing. I must ask you again to tolerate my English. Thank you for your attention.
(nehaj se ze opravicevat za
slabo anglescino, ker ni ;) editor's note*
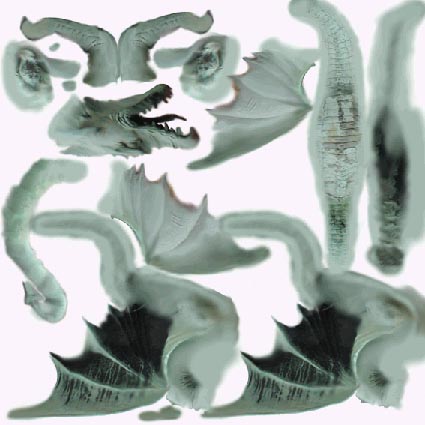
The final texture of the dragon...
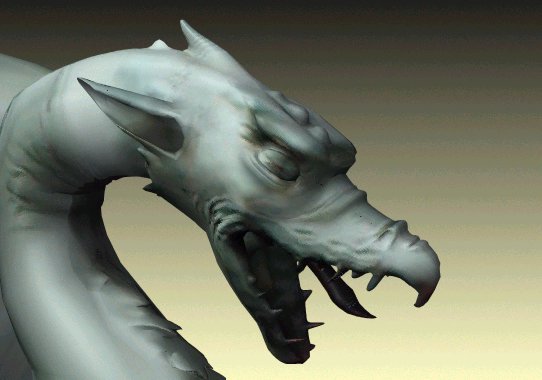
... and the detail of the head.
Return to spacekdet's trueSpace tutorials page